Just finished these two hours ago. Meanwhile the rest of the world seems to be wrapped in blizzards. I love Houston!!
Global buckets are based on the self-watering Earth Boxes, but are made from easy to find scrap materials. I did have to buy some 1.5" diameter PVC pipe and the soil mixture for inside the buckets, but everything else was just laying around.

1. inner bucket
2. outer bucket
3. fill tube made from 1.5" PVC tubing
4. cotton cloth to wick water from reservoir to soil
5. soil (mix of peat moss, topsoil, and vermiculite)
6. gap between two buckets which acts as the water reservoir

This is the bottom of the inner bucket.
A hole approximately 1.5"-2" in diameter is cut in the center of the bottom, this is for the cotton wick. A second hole 1.73" in diameter is cut near the edge of the bottom, this is for the fill tube. A bunch of small holes (about 5/16" in diameter) are drilled randomly around the bottom of this buck to improve drainage and allow air to get to the plant roots. Sidenote: do you really think I drilled a 1.73" hole? I just cut until the tube fit.

The bottom of the fill tube has a large notch cut in it to simplify the system.
A precise person could measure (twice) and cut (once) fill tubes to the exact length needed for perfection. Luckily, plants don't need a perfect system in which to grow, so just hack a chunk out of the bottom of the fill tube, stick it through the inner bucket, and whack it off somewhere around the top rim of the inner bucket.

An overflow hole is drilled in the outer bucket.
To keep from flooding the buckets a drain hole is drilled in the outer bucket just below the bottom of the inner bucket. Hopefully you can see how I precisely measured the location for this hole.

Completed buckets before adding soil.
Now you can see all the drain holes, the fill tube and the cotton wick. The wick was made from this really hideous dust ruffle thing that I've always hated. Hopefully this hatred won't affect the plants.

Getting ready to fill the buckets.
Being lazy, I didn't feel like holding up the wick while adding the soil so I tied it to a stick. This picture is slightly misleading as the wick does end 2"-4" below the top of the soil once the bucket is filled.

Making soil.
My soil recipe is based on Square Foot Gardening and is composed of roughly 1/3 cheap topsoil, 1/3 peat moss and 1/3 vermiculite (the stuff in the wheel barrow) mixed together thoroughly. The peat moss helps hold water, the vermiculite keeps the soil loose and aerated, the topsoil gives the plant roots a place to grow. Depending on what I grow, some fertilizer may be added to the particular bucket.
And here we are back at the beginning.
It took me about four hours total to make these eight buckets and they have all been planted with different wild edibles except for the one on the end which has chard I picked up on clearance.
This is a great way to set up a container garden in a small area, especially in hot, dry locations. Another benefit of these Global Buckets is that you can move them around to optimize their access to sun or to protect them from freezing.
Once the plants are growing I'll add either a thick layer of mulch or some secondary plant like nasturtiums to shade the soil which reduces evaporative water loss. Water is added to the system through the fill tube until water flows out the overflow hole. The plants will eventually grow their roots through the holes in the bottom of the bucket directly into the water reservoir. Until then the wick keeps the soil at the perfect level of moistness.
Update January 8th, 2011: to help protect the new plants from cold weather I picked up several 12" diameter cake covers from a local "dollar store". These covers fit over the buckets perfectly, turning them into mini-greenhouses. Originally I wanted to find some sort of clear bowl, but the shape of these cake covers works better as the fill tubes don't get in the way of the covers.

Water has condensed on the inside of the covers, making them translucent rather than transparent.
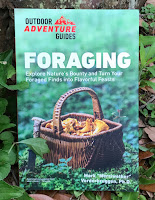
Buy my book! Outdoor Adventure Guides Foraging covers 70 of North America's tastiest and easy to find wild edibles shown with the same big pictures as here on the Foraging Texas website.