Let's start with flowers. Since the source of flavors from flowers reside on the flower's surface you can use blossoms either straight off the plant or in a dried form. Most flowers will have the best flavor right at opening which usually means mornings unless they're a night-bloomer. Pick flowers before the day's sun has baked away all their flavor. If they're to be dried make sure any morning dew or rain has evaporated away and then hang the flowers someplace to dry. Don't use a dehydrator as that'll force out much of the flower's delicate flavors...though your kitchen will probably smell great. To make flower tea, bring water to a boil, let it cool five minutes, pour it over the flowers, then let steep at least 5 minutes in a covered pot or mug (again to keep the flavors trapped in the tea).
Next up, leaves. Making tea from leaves requires aging the leaves first for best results. Remember, plant cells are enclosed in a rigid cell wall which among its duties is to prevent stuff inside the plant cell from getting out just as much as stopping stuff from outside the cell getting in. If you steep fresh leaves most of the flavors and medicinal components will remain trapped inside the leaves' cells rather than entering your tea. However, when a plant get's harvested or otherwise killed a set of enzymes inside the cell are activated and begin chewing holes in the cell wall. This is part of the mechanism used by plants to return their nutrients back to the soil when they die. After about two weeks the cell wall will have assorted holes so now when the leaves are soaked all their wonderful goodness will flow into the tea. To make tea from leaves, bring water to a boil then pour it over the dried and somewhat crumbled leaves, then let steep 3-10 minutes in a covered pot or mug. Strain out the leaves before drinking.
If you do want what's inside the leaves without the time needed to wait you must chop and grind the leaves up. This ruptures the cell walls, releasing the cellular compounds. The vitamin C found in pine needles or cleavers falls into this category. When one is suffering from scurvy one can't wait two weeks for the necessary vitamin C!
Fruit teas such as rose hip or Turk's cap fruit are similar to leaf teas in that dried fruits will give a better flavor than fresh fruits. Also, since the fruits are tougher than leaves go ahead and actually boil the fruits in the water for about five minutes then let everything cool down to a drinkable temperature. I eat the fruit afterwards but be sure to remove any rose seeds from the rose hips before drying as the fine hairs on rose seeds can cause irritation at the end of their journey through your digestive system.
Root and bark are usually the toughest parts of plants so they require vigorous boiling rather than just steeping in hot water. Boil roots/bark at least 10 minutes then remove from heat and let the tea steep and cool at least another 10 minutes before straining out the plant matter. As mentioned earlier, it's best if the plant has time to "age" a few weeks so that enzymes can break down the cell walls. If you need it right away you'll have to crush/grind the roots or bark.
Flowers for Tea:
Basswood, Barbados Cherry, Blackberry, Bottlebrush, Sweet Clover, Red Clover, White Clover, Dandelion, Dewberry, Elderberry, Goldenrod, Heal's All, Henbit, Horsemint/Lemon Beebalm, Mallow, Mullein, Parsley Hawthorn, Passionvine, Pineapple Weed, Rose, Milk Thistle, Turk's Cap, Violet, Wild Bergamot, Yarrow
Leaves for Tea:
Balloon Vine, Blackberry, Bottlebrush, Burdock, Carolina Bristle Mallow, Cleavers, Dandelion, Dewberry, Ginkgo, Goldenrod, Heal's All, Henbit, Yaupon Holly, American Holly, Horsemint/Lemon Beebalm, Lizard's Tail, Pine Needles, Loquat, Lyreleaf Sage, Mullein, Parsley Hawthorn, Passionvine, Pimpernel, Pineapple Weed, Sassafras, Stinging Nettle, Bull Thistle, Milk Thistle, Violet, Yarrow
Roots, Barks, Fruit, and Mushrooms for Tea:
Blackberry, Buffalo Gourd, Burdock, Chicory, Dandelion, Dewberry, Honey Locust seedpods, Horsetails, Indian Strawberry, Lizard's Tail, Mallow Seeds, Mayhaw, Reishi Mushroom, Turkey Tail Mushroom, Parsley Hawthorn Fruit, Rose Hips, Sassafras, Slippery Elm, Sumac Berries, Bull Thistle, Milk Thistle, Turk's Cap Fruit, Willow
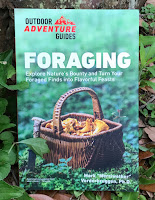
Buy my book! Outdoor Adventure Guides Foraging covers 70 of North America's tastiest and easy to find wild edibles shown with the same big pictures as here on the Foraging Texas website.